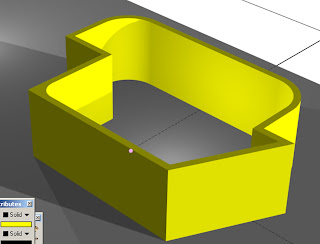
- Walls are part of what we call 'Hybrid Objects'. They display different attributes when in Top/Plan view compared to any 3D view.
- The Building Shell Sub-Palette (Green Roofed House Icon) is found in the Tool Sets Palette and contains all of the tools needed to construct and edit walls in Vectorworks.
This tool works the same as drawing using the normal Polygon tool. Simply click and move the mouse to determine the direction to draw in.
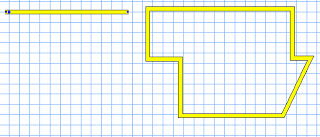
- To draw a single wall, click, drag and then double click to finish.
- You may draw multiple walls at one time, simply click, drag click again and then continue to draw a second wall length. Double-Click as normal to finish.
- All the walls will be selected once you have finished drawing them, this makes it easy to give heights and attributes quickly.

Image above shows a single wall and multiple walls viewed in Top/Plan View
Setting Prefernces and Drawing Modes:
Before drawing walls it is often best to set certain Preferences first and also to decide on which drawing mode to work with. These can all be set through the Mode Bar.
- Drawing Modes are similar to those of the Double Line Polygon Tool. Each one has a different control method for where the computer places the two wall lines in relation to the mouse on screen.
- Vectorworks has dozens of Pre-Set Wall styles to choose from in the Wall Preferences Box.
- For now maybe just worry about using the simple 'default' Wall Style and Pre-setting the Wall thickness only.
The lengths of walls can be adjusted in two ways:
- manually by dragging one end of the wall to a new position. Take care to select the correct cursor (double-headed 'angled arrow' cursor). Note that we can also change the angle of the wall this way as well.
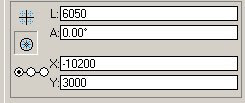
- or in the Obj Info. Palette. Adjust the L value, found under the polar co-ordinates settings. (Note that we can also change the angle of the wall here as well).

- We can also Re-position both the end and centre points of a wall on the grid using the x/y settings in the Object Info. Palette.
The Object info Palette also contains controls for these other settings:
- +Z : Sets the overall height of the wall.
- Bot Z : Sets the height that the wall starts at (Can be both positive and negative).
- Thick : Sets the thickness of the wall (If changed the wall will alter from its center-line).
- Caps : Draw lines to 'cap' the start and end of a wall. This is for 2D work only, wall ends will always be solid in 3D.
- Type: Set the Caps to be either Round or Flat.
This tool has many modes and requires a bit of practice to understand but acts just like the straight wall tool in many respects. We will cover this tool in greater depth at a later date!
Wall Join Tool:
We use this tool to join two walls together so that there are no gaps in our 3D model as well as 2D drawing.
- There are five modes to this tool and each one corresponds to a particular situation, use the diagrams as clues.
- They all work by clicking on one wall and then drawing a line to the wall to join to.
- It makes a difference which wall is selected first so if the result is not what you expected try again in another order.

Remove Wall Breaks tool:
- When splitting or moving walls away from one another a hole may be left in the side of one wall.
- We can use the Remove Wall Breaks tool (Wall Heal Tool) to fix this. Simply draw a box marquee around the 'break' and it will be filled in.
- This tool can also be used on walls which have mitred ends resulting from previously being joined to another wall.
Fillet Tool (Basic Palette):


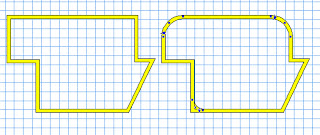
- Use the fillet tool to produce rounded corners to two walls that meet each other. Select the Fillet mode and Set the Fillet Preferences in the mode bar. In top view click on one wall and then on the second.
- Try out the three settings for different results. The Fillet can be either 'external' or 'internal'.
- Individual and multiple walls can be picked up and moved and you will find that it is often useful to nudge them into place by holding down shift and using the arrow keys.
- Take care when editing walls, to lengthen, rotate and move walls requires different cursors. Get to know them and have patience at first when trying to find a particular one!